Visitor Management System in Hospitals
Introduction
This manual is meant to assist the user with SARALWEB’s visitor management system in hospitals. The solution allows you to add patients, generate visitor’s QR code, share it on Whatsapp, and discharge patient.
Accessing the SARALWEB Visitor Management solution on browser
Once your IN and OUT devices have been connected to your local WI-FI network, you can access the visitor management solution on your browser,through the following steps
Connect your laptop/desktop with the same WI-FI network, which has been used to connect the OUT device
On your OUT device, tap on “Click for Home Page”
A keyboard will appear on your screen. The screen will also show the device’s serial number and the IP address
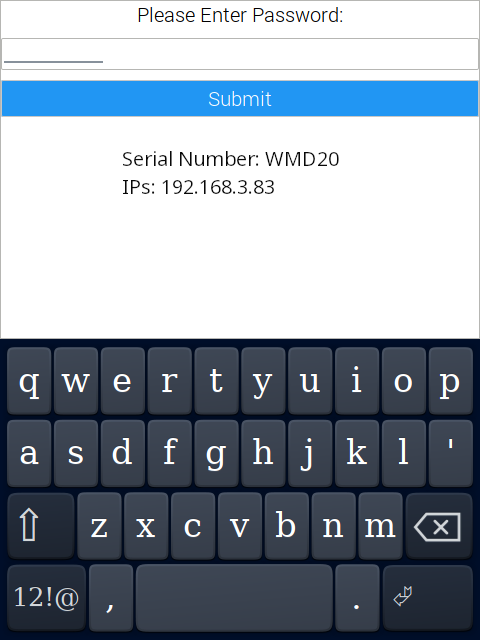
Insert the IP address on your browser
You can now access the visitor management solution on your browser and perform the daily operations.
One Time Setup
Adding the site
Sites are the location where we are implementing the visitor management solution. Eg: A Department in Hospital. To add a site, we will use the following steps
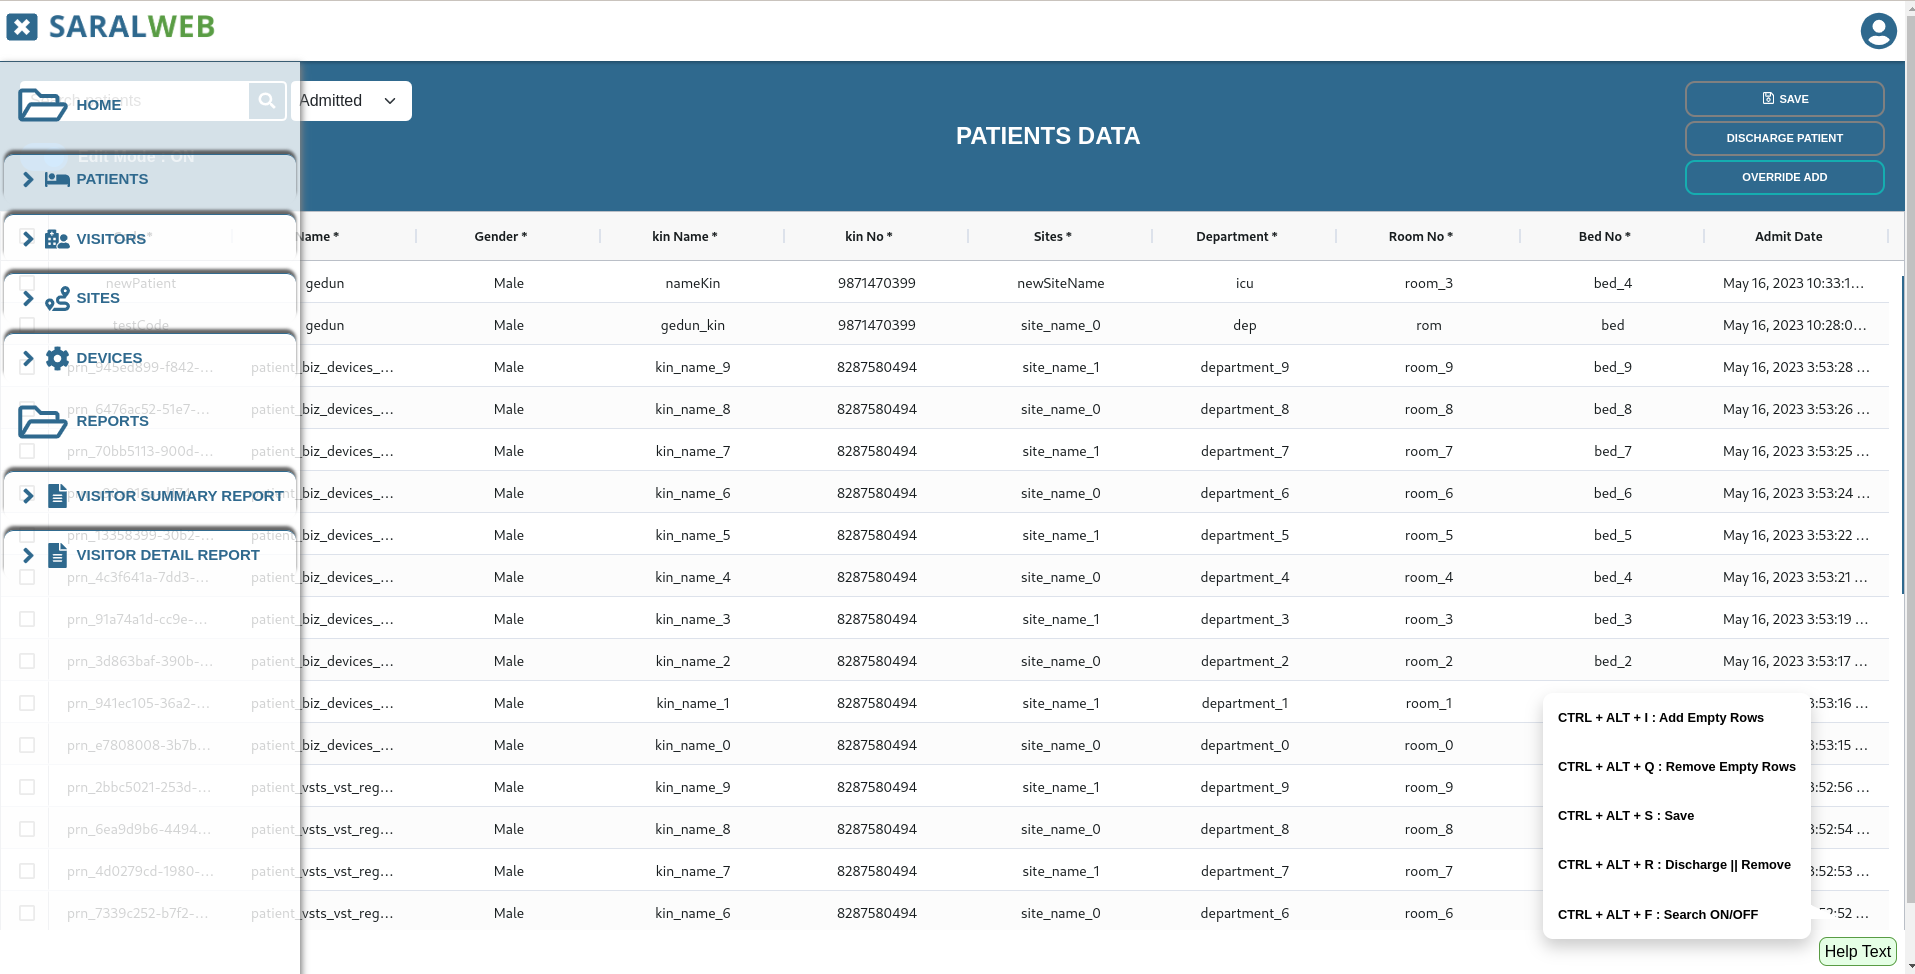
Click on the menu button present on top left corner of the screen
Select “SITES” by clicking on it
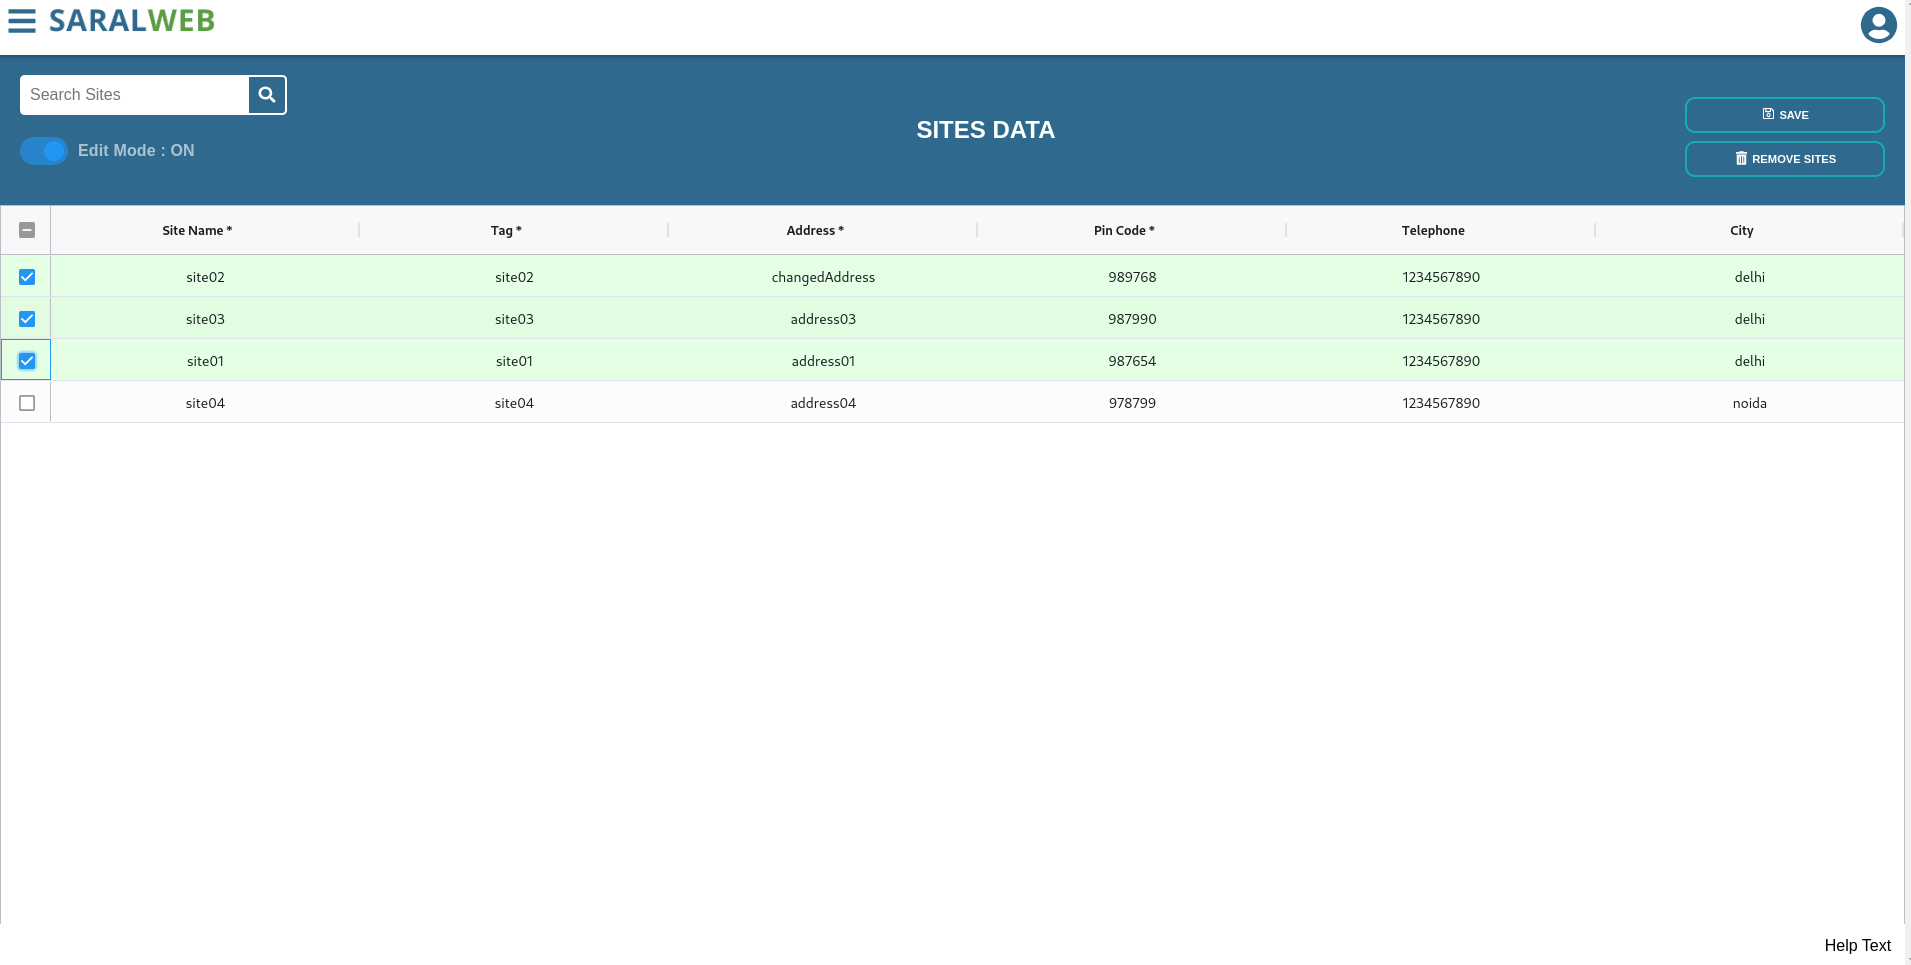
SITES DATA page will open on your screen
Turn on the Edit Mode, by clicking on the button
Once the edit mode has been turned on, we can add sites to our system.
Press Cntrl+ALT+I to insert a new row
Fill in the necessary details, and click on save. (You may use Cntrl+ ALT + S as a keyboard short cut)
Understanding the fields
Site Name : The name of the site, within your premises, where you wish to implement the visitor management system.
Tag : An identification code that is assigned to the site
Address : Address of the site. This field helps in distinguishing various sites within an organization
Pin Code : Pin code of the address added in the Address field
Telephone : The telephone number of the site, which can be used by the admin. department
City : The city in which the site being added is situated in. This field is useful when the sites are geographically separated.
PS : The fields with “*” are mandatory fields
Adding the device
Once we have added the site’s information, we need to allocate the device to the site. To do so, we will add device to the system using the following steps
Click on the menu button present on top left corner of the screen
Select “DEVICES” by clicking on it
Devices Page will open on your screen
Turn on the Edit Mode, by clicking on the button
Once the edit mode has been turned on, we can allocate devices to our sites
Press Cntrl+ALT+I to insert a new row
Fill in the necessary details, and click on save. (You may use Cntrl+ ALT + S as a keyboard shortcut)
Understanding the fields
Device Name : The name assigned to the device being allocated to the site
Code : The code assigned to the device being allocated to the site
Serial Number : The serial number of the device being allocated. You may check the device’s serial number by tapping on Click to Connect to WiFI
Sites : Select the site at which the device is being allocated using the drop down menu. Please note that the drop down menu will only show the names of the sites that were added through SITES page
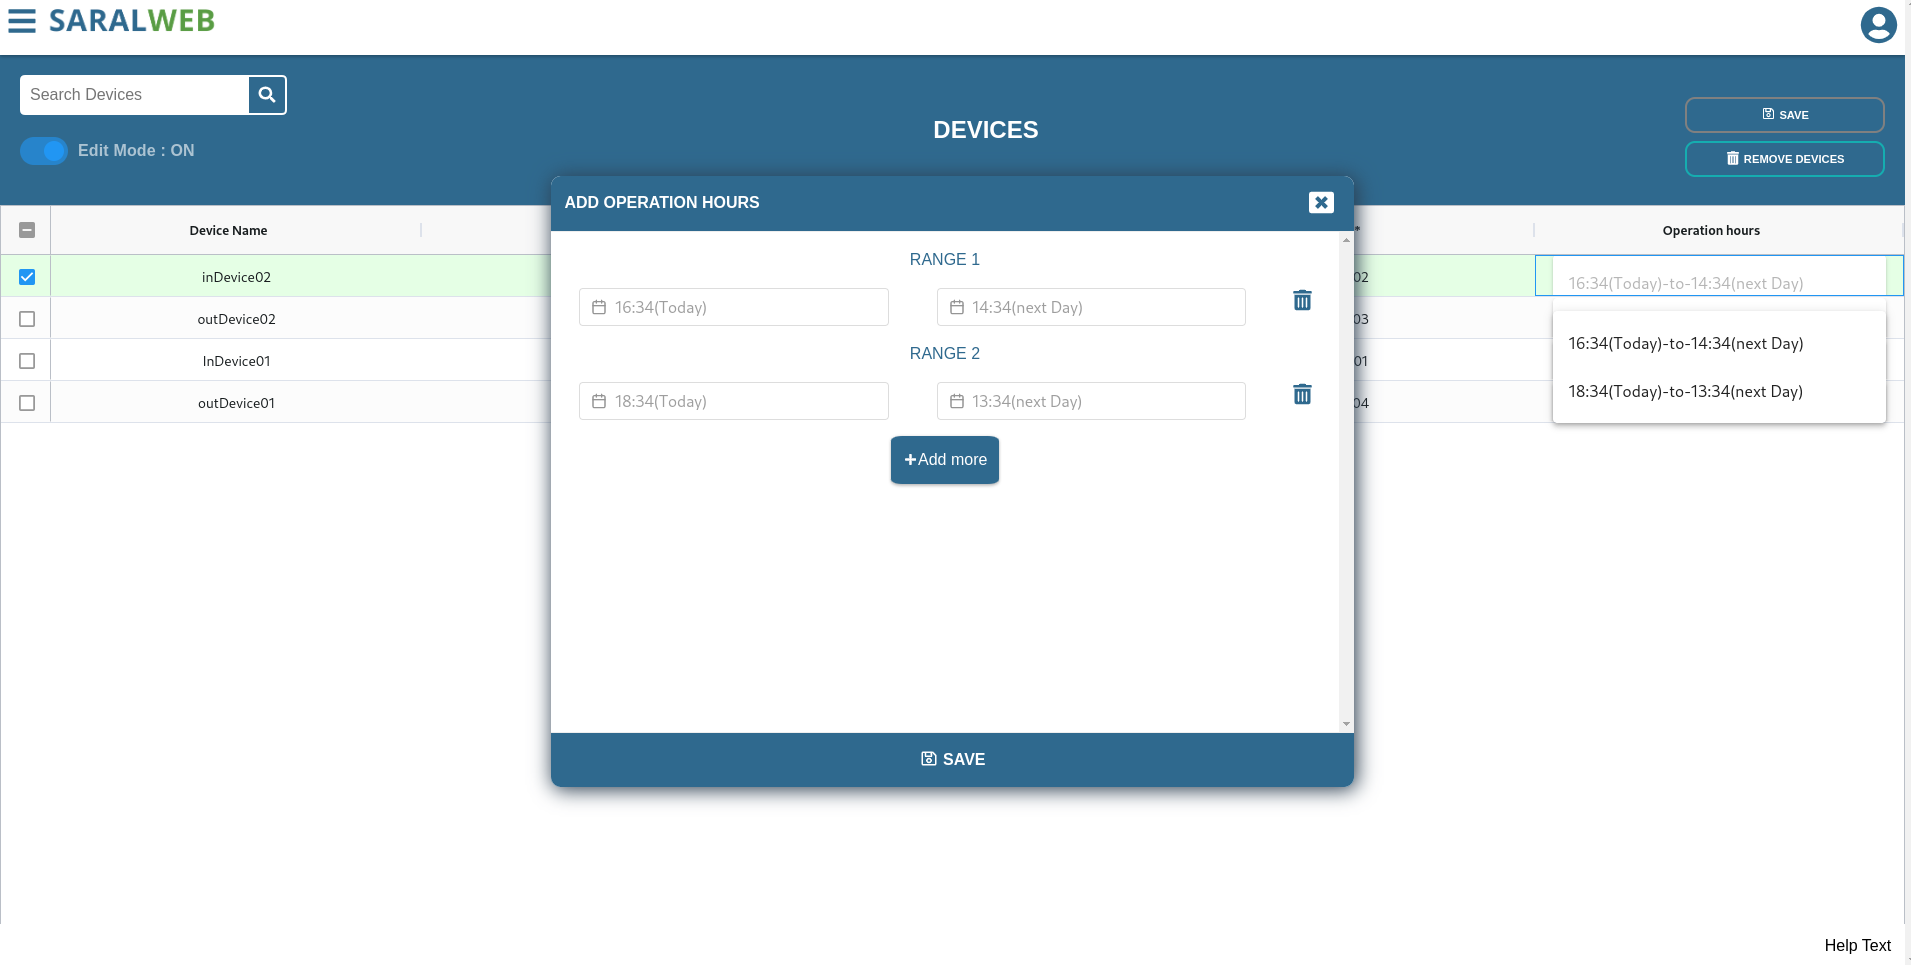
Operation hours: This field is used when the device needs to be active only for a certain time period such as visiting hours. This field is not mandatory and if left blank. Device will be active for all hours of the day
PS : The fields with “*” are mandatory fields
Routine Operations
Logging in your account
You can use the following steps to log-in into your account
Open the Visitor Management Solution link, using the link provided to you by SARALWEB
Fill in the BUSINESS NAME, USER NAME, and PASSWORD
Click on login
You will land on the home page of your visitor management solution
Adding a Patient
Once we have defined the sites and have allocated the devices to the them, we can proceed for using the Visitor Management System. Patient’s information is added to the system and visitor’s are recorded against it. To add the patient, we use the following steps
Click on the menu button present on top left corner of the screen
Select “PATIENTS” by clicking on it
Patients Data Page will open on your screen
Turn on the Edit Mode, by clicking on the button
Once the edit mode has been turned on, we can add patient’s information to our system
Press Cntrl+ALT+I to insert a new row
Fill in the necessary details, and click on save. (You may use Cntrl+ ALT + S as a keyboard shortcut)
Understanding the fields
Code : Patient’s code assigned by hospital at the time of admittance
Name : Name of the patient being admitted
Gender : Gender of the patient being admitted
kin Name : Name of the main attendant of the patient being admitted
kin No : The mobile number of the patient on which the QR code would be sent using Whatsapp
Sites : The site at which the patient would be admitted. This will be available as a drop down menu
Department : The Department in which the patient is being admitted
Room No : The room number of allocated to the patient
Bed No : The bed number within the room, allocated to the patient
Admit Date: The date of admittance for the patient. This is not a mandatory field and will be added automatically if left blank.
Discharge Date : The date of discharge of patient. Please note that, this field is not visible while admitting the patient.
QR Code : The QR code that is automatically shared with the main attendant
Patient’s info : Any additional information regarding the patient can be added in this field.
PS : The fields with “*” are mandatory fields
Resending the QR Code
If you wish to resend the QR code to the patient’s attendant, please follow the steps below
Go to Patients Data page, through “PATIENTS option available in HOME menu
In the row containing the patient’s information, you would find the QR code under the column header QR Code
Click on the QR code you wish to send
The QR code will open in the pop up window, with two options: Save and Share.
Click on Share button
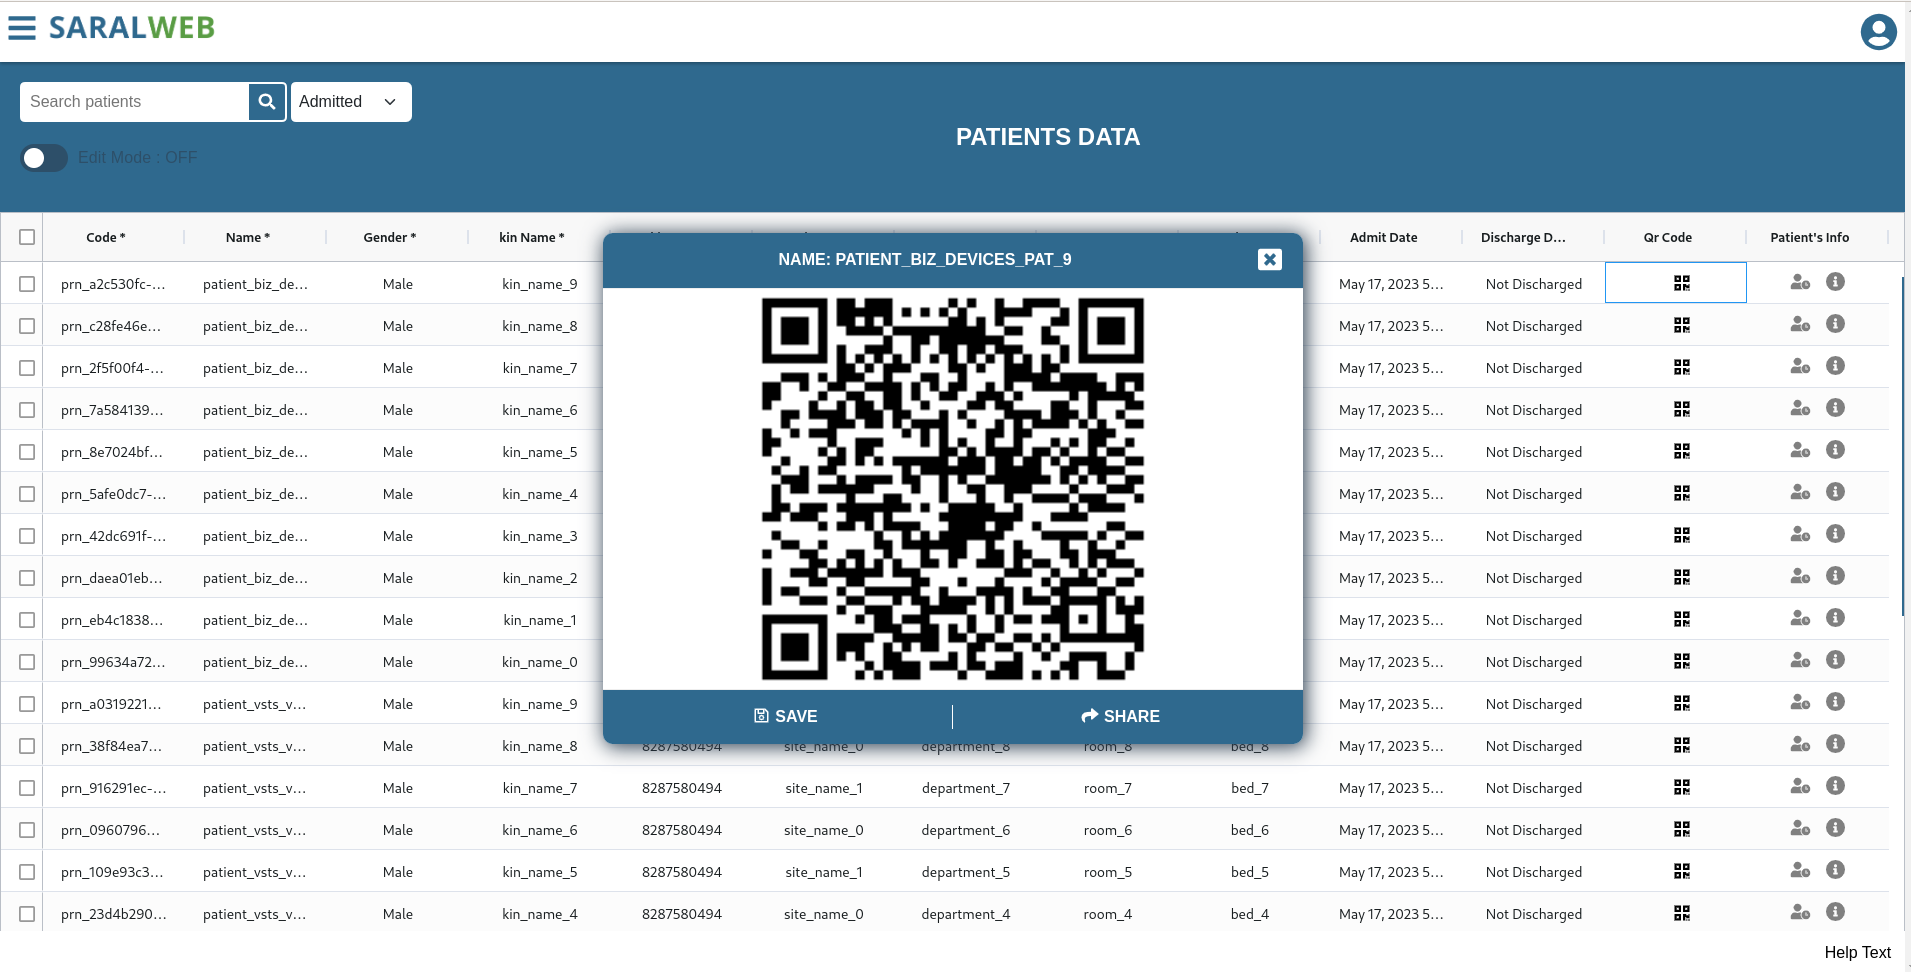
The QR code will be sent to the number registered in the kin No column.
Checking the visitors
Understanding the fields
image : The captured image of the visitor will be displayed
Visitor Code : The automatically assigned visitor code is displayed here
Patient Name : The name of the patient who was visited by the visitor
Room Number : The room number where the visitor had paid their visit
Bed Number : The bed number of the patient whom the visitor visited
Patient Code : The code of the patient who was visited by the visitor
Reports
There are two reports that are automatically generated namely Visitor Summary Report and Visitor Detail Report . You may access the report by following
Visitors Summary Report
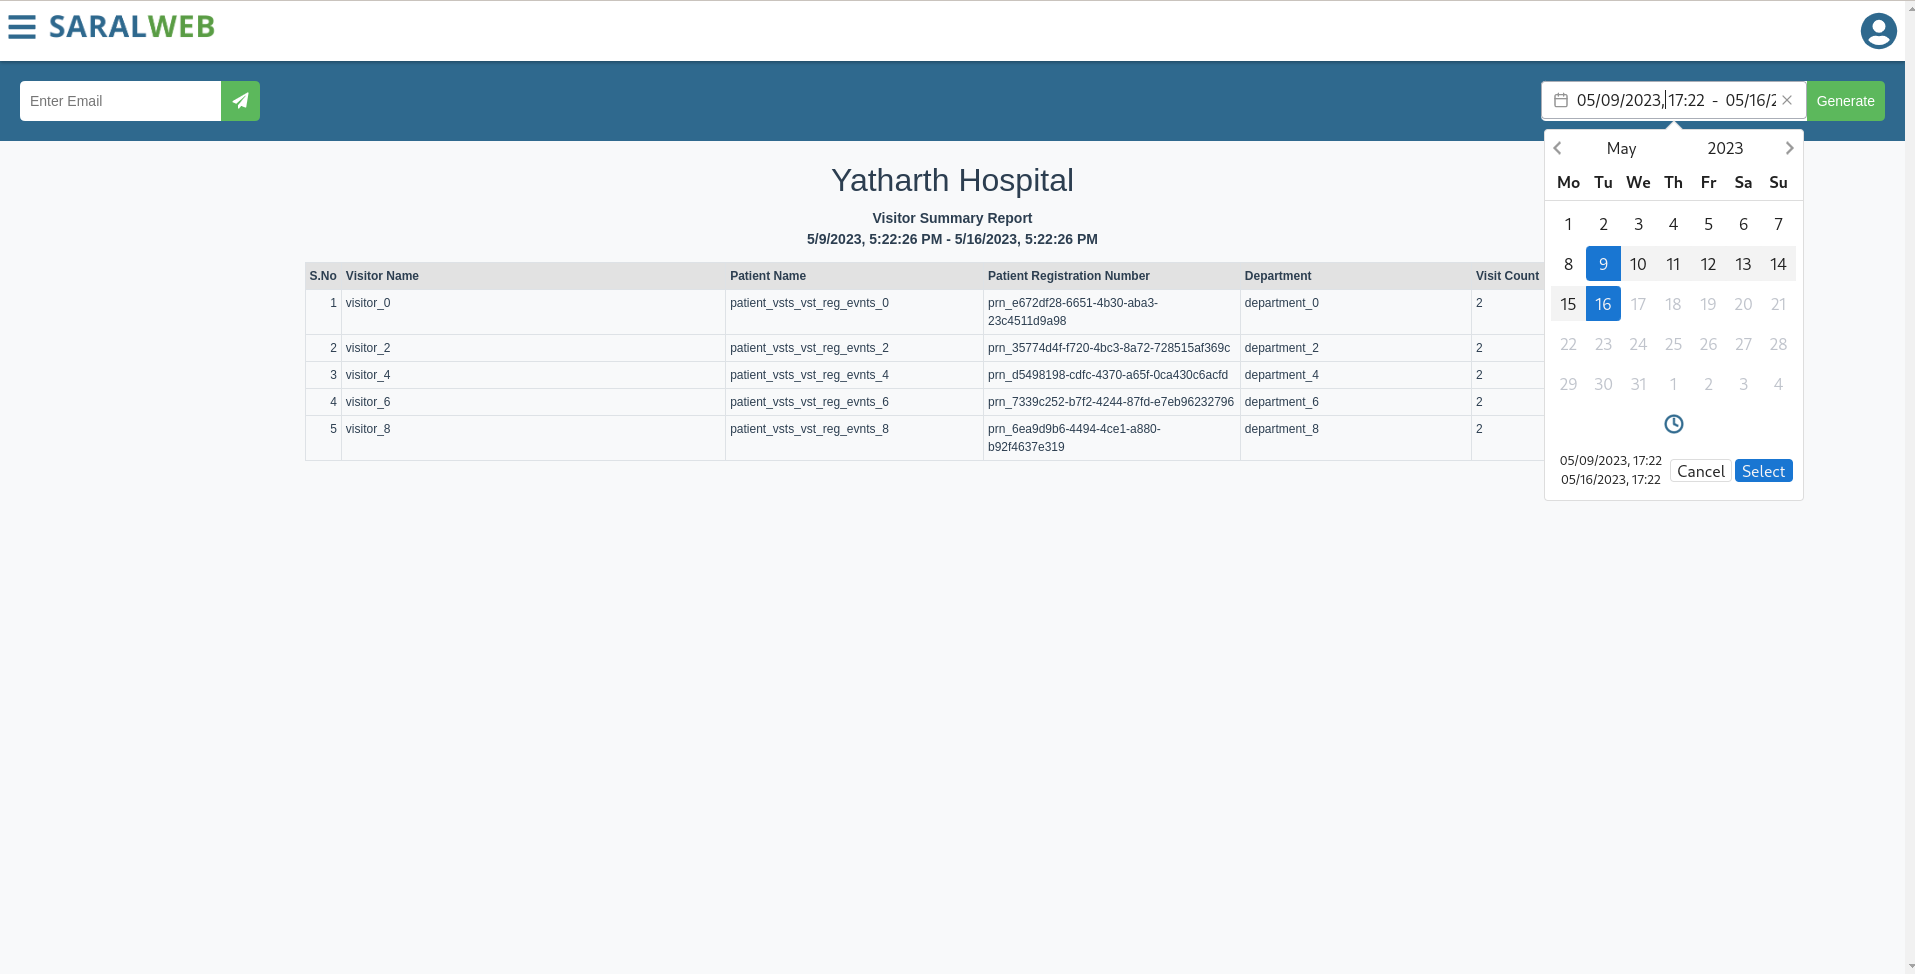
Visitors Summary Report shows the summary of visitors and the total number of times a patient was visited.
Click on the menu button present on top left corner of the screen
Visitors Detail Report
Visitors Detail Report provides a detailed information of the time at which the visitor entered the premises, along with their face’s photograph.
Click on the menu button present on top left corner of the screen
Changing the Dates in Report
You may change the date of the report using option available on top right hand corner of the screen.
Click on the date field
Select the date range for which you wish to check the report for
Click on Generate
The report for the respective dates will appear on your screen
